
Why Smart Thermostat Installation is a Game-Changer for Your Home
Smart thermostat installation can save you up to 15% on heating and cooling costs while giving you complete control over your home's comfort from anywhere. Most homeowners can complete the installation in just 20-30 minutes with basic tools and careful attention to wiring.
Quick Smart Thermostat Installation Overview:
- Turn off power at the circuit breaker
- Remove old thermostat and take a photo of existing wiring
- Label wires with provided stickers or masking tape
- Install new base plate using a level and wall anchors
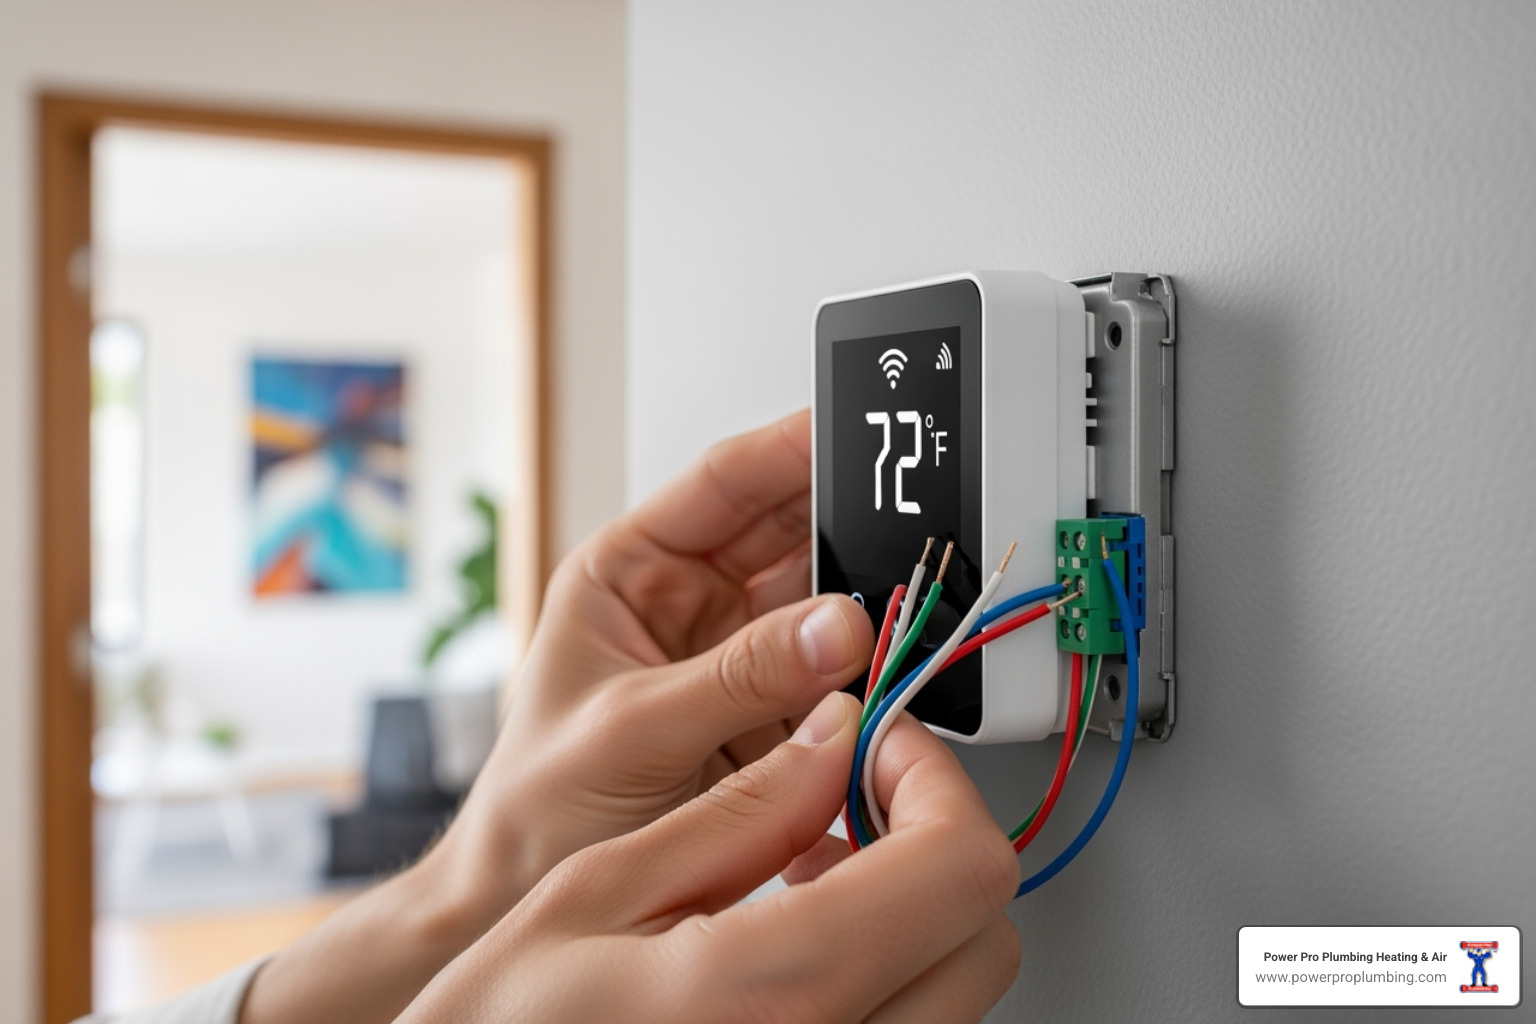
- Connect wires to matching terminals on new thermostat
- Mount display and restore power to system
- Connect to Wi-Fi and download companion app
The process is straightforward for most homes, but there's one key requirement that can complicate things: the C-wire (common wire). This provides continuous power to your smart thermostat's advanced features. While newer homes typically have this wire, older systems may need an adapter or professional installation.
Smart thermostats do more than just control temperature - they learn your habits, create automatic schedules, and integrate with voice assistants like Alexa. With 81% of smart home product owners more likely to buy homes with pre-installed smart technology, this upgrade also boosts your property value.
Before diving into installation, you'll need to check compatibility with your HVAC system and gather basic tools like screwdrivers, a level, and wire labels. Most systems work with smart thermostats, but heat pumps and older equipment may have specific requirements.

Before You Begin: Preparation and Compatibility
A little preparation makes smart thermostat installation much smoother. Before you start, gather the necessary tools to avoid any delays. You'll want a screwdriver with both Phillips and flathead bits and a level to ensure your new thermostat is installed straight. For safety, a voltage tester is highly recommended to confirm the power is off before you touch any wires. Wire strippers, pliers, electrical tape, a pencil, and masking tape for labeling are also helpful to have on hand.

Here's your complete shopping list:
- Screwdriver (Phillips and flathead)
- Level
- Voltage tester (strongly recommended)
- Wire strippers and pliers (optional but helpful)
- Electrical tape and masking tape
- Pencil for marking
- Wall anchors (if your new thermostat doesn't align with existing holes)
Most smart thermostats work with standard heating and cooling systems, but some older or specialized systems might need extra attention. It's always best to check for compatibility before purchasing.
Essential Pre-Checks for Your Smart Thermostat Installation
Safety is the top priority. Before touching any wires, you must turn off the power to your HVAC system to protect yourself and your equipment.
Go to your circuit breaker panel and find the breakers labeled "furnace," "air handler," or "HVAC." Flip these switches to the off position. Some systems also have a dedicated HVAC switch near the furnace itself—turn that off as well.
Once the power is off, use your voltage tester on the thermostat wires to confirm there is no current. This is a crucial safety step.
Next, verify compatibility. Most modern smart thermostats work with standard systems, but it's wise to check first. The Google Nest thermostat compatibility checker and Ecobee thermostat models compatibility checker are helpful online tools that guide you through your current setup.
Finally, consider the location. Your thermostat should be on an interior wall, away from direct sunlight, drafty windows, or heat sources like lamps, which can cause inaccurate temperature readings. For more detailed guidance, check out our Best Thermostat Placement Tips.
Understanding the C-Wire (Common Wire)
The C-wire (common wire) is often the deciding factor in a DIY smart thermostat installation. Unlike older thermostats that only needed power intermittently, smart thermostats require continuous power to run their Wi-Fi connections, displays, and other smart features. The 24V power from a C-wire provides this constant energy.
The C-wire is typically blue, but since wire colors aren't standardized, it could be another color. The important thing is whether it's connected to the "C" terminal on your current thermostat.
To identify a C-wire, turn off the power, remove your old thermostat's faceplate, and look at the base plate. If a wire is connected to a terminal marked "C," you have one. Sometimes, an unused wire is tucked into the wall that can be connected to serve as a C-wire.

If you don't have a C-wire, don't worry. While newer homes are more likely to have one, solutions exist for older systems, such as power adapters, which we'll cover later. For now, just identify your current setup.
Your Step-by-Step Smart Thermostat Installation Guide
With your prep work done, you're ready for the actual smart thermostat installation. The process is straightforward and typically takes 30-45 minutes. By staying organized and following these steps, you can successfully upgrade your home's comfort and efficiency.
Step 1: Remove the Old Thermostat and Label Wires
Start by gently removing your old thermostat's faceplate. Most pop off with a gentle pull, but some may have small screws. Avoid forcing it to prevent damage.
With the faceplate off, you'll see the base plate and the connected wires. Take a clear photo of the current wiring. This photo will be an invaluable reference when connecting your new thermostat.
Next, label the wires. This is a crucial step because wire colors aren't standardized, so you must rely on the terminal letters. Use the stickers included with your new thermostat or pieces of masking tape to label each wire with its corresponding terminal letter (R for power, G for fan, Y for cooling, W for heating, and C for common).

After labeling, carefully disconnect each wire. To prevent the wires from falling back into the wall, wrap the bundle around a pencil or tape them to the wall temporarily.
Step 2: Install the New Base Plate and Connect Wires
Unscrew the old base plate from the wall. Feed your labeled wires through the center opening of the new base plate and hold it against the wall. Use your level to ensure it's straight, as a crooked thermostat can affect temperature readings.
Mark the new screw holes with a pencil. If they don't align with the old ones, use the wall anchors provided with your thermostat. Screw the new base plate in place with a manual screwdriver to avoid overtightening and cracking the plastic.
Using your photo and labels as a guide, connect each labeled wire to its matching terminal on the new base plate. Most smart thermostats have either push-in or screw terminals. Ensure each connection is snug by giving each wire a gentle tug. A loose connection is a common cause of thermostat issues. Once connected, neatly tuck any excess wire back into the wall opening so the faceplate will sit flush.
Step 3: Mount the Thermostat and Restore Power
Align your new smart thermostat's display unit with the base plate and click it into place. If you feel resistance, check that no wires are obstructing the connection and that it's aligned correctly.
With the thermostat securely mounted, go back to your circuit breaker panel and restore power. Your new smart thermostat should power on.
It may take a minute or two to boot up. The thermostat will then guide you through initial setup prompts on the screen, such as selecting your language and connecting to Wi-Fi.
Advanced Smart Thermostat Installation: The C-Wire Challenge
If your smart thermostat installation is stalled by the lack of a C-wire, you have several options.
The most common solution is a C-wire adapter or "add-a-wire" kit. These devices are installed at your furnace or air handler and use your existing wiring to create a C-wire connection. Most kits come with clear instructions.
Ecobee thermostats often include a Power Extender Kit (PEK), which functions like a C-wire adapter. The PEK is wired into your HVAC system's control board to provide the continuous power needed.
In some cases, you may find an unused wire tucked behind your old thermostat. You might be able to connect this wire to the "C" terminal on your HVAC system's control board to serve as your C-wire.
These solutions, however, add complexity and require working with wiring at your furnace or air handler. If you're not comfortable with this level of electrical work, or if your system is complex, it's best to call a professional. The peace of mind is often worth the cost, especially when compared to potentially damaging your HVAC system. For more guidance, see our article on HVAC Problems Needing Contractor Help.
Finalizing Your Setup: Wi-Fi, App, and Troubleshooting
Once your new smart thermostat is mounted, the final step is connecting it to your network and setting up its features. This process transforms it into a powerful home automation tool that saves money and improves comfort.
Connecting to Wi-Fi and Setting Up the App
Your thermostat's on-screen instructions will guide you through the setup. First, connect to your home's Wi-Fi network by selecting it from the list and entering your Wi-Fi password. Most smart thermostats require a 2.4GHz Wi-Fi connection, so select that band if you have a dual-band router.
Once connected, the thermostat will prompt you to download its companion app. For an ecobee, for example, you can Download the ecobee app. The download is free from your device's app store.
Next, create an account and link your thermostat to your profile, usually by scanning a QR code or entering a setup code from the thermostat's screen. Finally, complete the configuration by naming your thermostat and confirming your location for weather-based features. The whole process takes just a few minutes, giving you full climate control from your phone.

Common Troubleshooting Steps
Even with a careful smart thermostat installation, issues can arise. Most have simple solutions.
- Thermostat won't turn on: First, check the breaker to ensure you've restored power. Also, confirm the display unit is securely clicked onto the base plate and that all wire connections are snug.
- HVAC system isn't responding: Verify your wire connections against the photo you took earlier. A single misplaced wire can cause issues. Also, check for a blown fuse on your furnace or air handler's control board, which can sometimes happen during installation.
- Wi-Fi connectivity issues: Ensure your thermostat is within range of your router and that you've entered the correct password. Try restarting your router and thermostat. Remember to connect to the 2.4GHz band.
- Incorrect temperature readings: Check for environmental factors near the thermostat, like direct sunlight, lamps, or drafts. These can skew readings. Some models also allow for manual calibration in the settings.
Maximizing Your Savings and Comfort
Open up your smart thermostat's full potential to maximize energy savings and comfort.
- Set schedules: Program your thermostat to adjust temperatures automatically when you're away or asleep. This is one of the most effective ways to reduce energy bills.
- Use eco modes: When you're away for extended periods, eco modes maintain a safe temperature range (e.g., 60-85°F) without running your HVAC system constantly.
- Enable geofencing: This feature uses your phone's location to automatically adjust the temperature when you leave and return home.
- Use learning capabilities: Some models learn your habits over a week or so and create schedules based on your adjustments. You can always fine-tune these automated schedules.
For optimal savings, The U.S. Department of Energy recommends setting your thermostat to 68°F in winter and 78°F in summer when you're home. Adjusting the temperature by 7-10 degrees for 8 hours a day can save up to 10% on your energy costs. Your smart thermostat makes these savings effortless.
Frequently Asked Questions about Smart Thermostats
Here are answers to some of the most common questions we receive about smart thermostat installation.
How long does a smart thermostat installation take?
Most DIY smart thermostat installation projects are quick, taking about 30-60 minutes for a straightforward setup with a C-wire. If your system requires a C-wire adapter or has other complications, it might add another 30-45 minutes to the process. Professional installation time is often similar, but an expert can handle any unexpected issues on the spot.
What should I do with my old thermostat?
Don't throw your old thermostat in the trash, as many older models contain mercury. Take it to an e-waste facility or a local hazardous waste collection event for safe disposal. It's also a good idea to keep it as a backup for a few weeks. If you encounter any issues with your new smart thermostat, you can temporarily reinstall the old one while you troubleshoot.
When should I hire a professional for installation?
While many installations are DIY-friendly, calling a professional is the smart move in certain situations.
- High-voltage systems: If you have 120V or 240V systems, like electric baseboard heaters, a professional is required for a safe installation. Most smart thermostats are designed for low-voltage (24V) systems.
- Complex wiring: Multi-stage heating and cooling, dual-fuel systems, or zoned homes have intricate wiring that is best handled by an experienced HVAC technician.
- No C-wire and you're uncomfortable with adapters: If you lack a C-wire and are not comfortable working inside your furnace's control panel to install an adapter, it's wise to call an expert.
- If you're unsure at any step: If you feel uncertain at any point, it's best to stop and consult a professional. The cost of a service call is minor compared to potentially damaging your HVAC system.
Professional installation guarantees the job is done safely and correctly, and technicians can often provide valuable advice on optimizing your system's performance.
Get Professional Help for a Flawless Installation
Installing a smart thermostat yourself can be incredibly rewarding. You get that satisfying feeling of upgrading your home with your own two hands, plus you'll save money while gaining complete control over your comfort and energy bills. It's one of those home improvements that keeps giving back – month after month of lower utility bills and the convenience of adjusting your temperature from anywhere.
The energy efficiency benefits alone make smart thermostat installation worthwhile. When your system runs more efficiently, it also lasts longer with less wear and tear. Speaking of longevity, keeping up with regular HVAC maintenance becomes even more important once you've invested in smart technology. Our Benefits of HVAC Preventative Maintenance guide explains how routine care ensures your new smart thermostat and HVAC system work together seamlessly for years to come.
But let's be honest – not every smart thermostat installation goes smoothly. Sometimes you'll uncover complex wiring that wasn't visible from the outside, or find your system has unique requirements that weren't obvious at first glance. Maybe you're staring at a bundle of unlabeled wires that don't match any diagram you've seen, or your home has a multi-zone system with more complexity than you bargained for.
That's where professional installation becomes invaluable. When you work with certified HVAC technicians, you're not just paying for the installation – you're investing in peace of mind. They've seen every possible wiring configuration and can handle tricky situations that would stump most homeowners. Plus, professional installation often comes with warranties that protect your investment.
Here in Southern California, Power Pro Plumbing Heating & Air has helped thousands of homeowners across the greater Los Angeles area upgrade to smart thermostats safely and correctly. Our certified technicians serve communities from Long Beach to Santa Clarita, from Beverly Hills to Riverside, and everywhere in between. With over 28,573 online reviews, our team has the experience to handle any installation challenge, whether you're dealing with an older home in Pasadena or a newer construction in Anaheim.
As a Daikin Comfort Pro, we also provide strong warranties on our work, so you can feel confident your smart thermostat installation is done right the first time. Our Power Pro Club maintenance program keeps your entire system running efficiently long after installation day.
Ready to make the smart move? Contact us for expert thermostat and HVAC services and let our professionals handle your installation with the expertise and care your home deserves.