

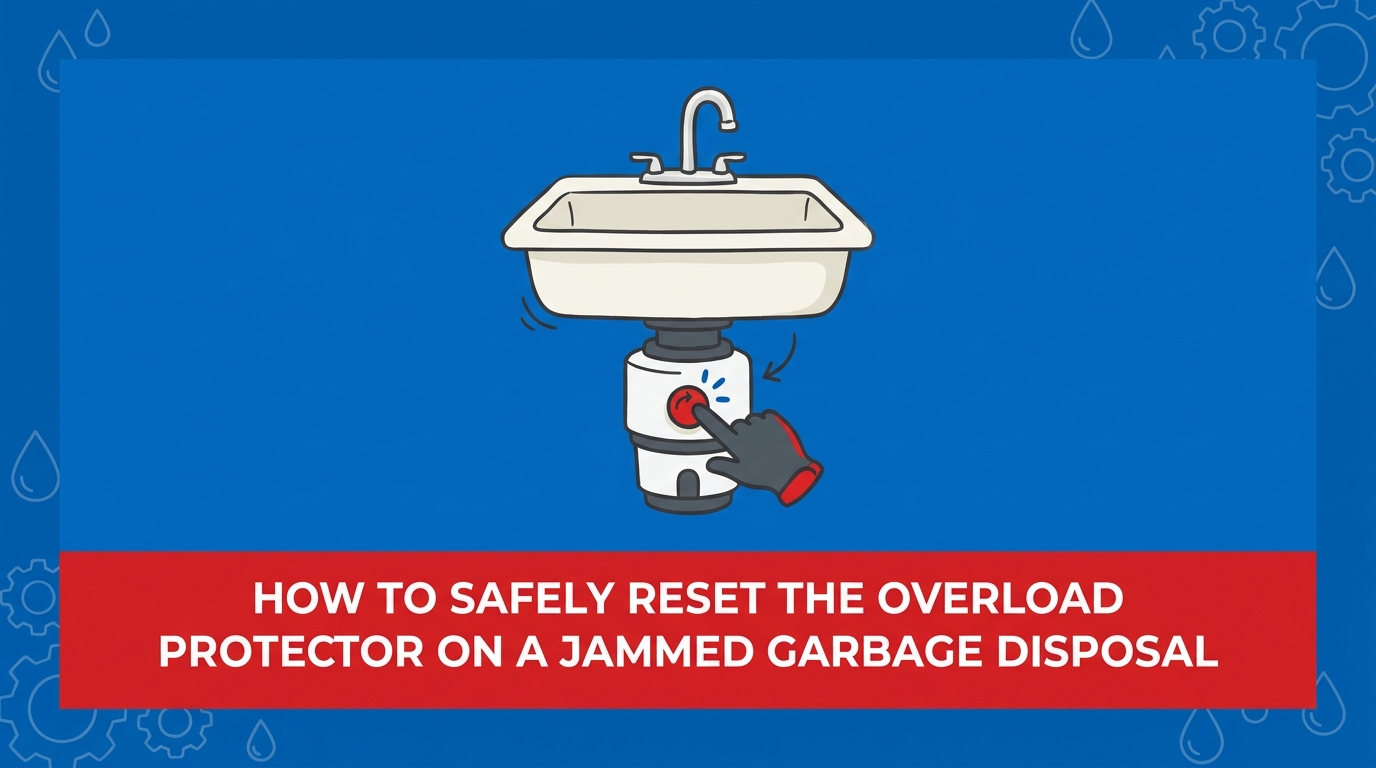
When Your Garbage Disposal Suddenly Goes Silent
You flip the switch at the sink, but instead of the familiar grinding noise, your appliance just hums aggressively—or worse, remains completely dead. Knowing exactly how to safely reset the overload protector on a jammed garbage disposal is a critical skill for any homeowner, especially when you are caught off guard during early fall cooking prep. A sudden failure while clearing potato peels, celery stalks, or other seasonal vegetable scraps can bring your kitchen cleanup to a frustrating halt. The immediate worry is always the same: is the motor permanently burned out, or has the system just temporarily tripped to protect itself?
Most modern kitchen disposal units feature an internal overload protector, which acts as a built-in safety mechanism. When the impellers become stuck on hard objects or tough fibrous foods, the motor begins to draw excessive electrical current as it struggles to turn. Before this electrical surge can cause the motor windings to overheat or spark an electrical fire, the overload protector deliberately cuts the power. This means that a silent unit is often working exactly as intended. By following a safe, mechanical sequence, you can frequently resolve the issue and restore function to your kitchen without immediately needing to call for professional plumbing services or schedule plumbing repair services.
Understanding the Thermal Switch on a Standard Continuous Feed Disposal
Before reaching under the sink to press buttons or insert tools, it is important to understand the mechanics of what you are actually resetting. A standard continuous feed disposal relies on a specific component known as a thermal switch. This switch is the heart of the overload protection system, designed to monitor the temperature and electrical load of the motor housing in real-time.
The Mechanics of Overheating and Tripping
The thermal switch operates using a simple but highly effective bimetallic strip. As the motor works harder to chew through a tough obstruction—like an errant piece of silverware, a fruit pit, or a dense mass of fibrous vegetables—the internal temperature rapidly spikes. When the heat reaches a critical threshold, the bimetallic strip bends, breaking the electrical circuit and instantly stopping the motor. This is why a tripped breaker on your unit is actually a symptom of a physical obstruction, not necessarily a sign of a broken or defective appliance.
Common triggers for a thermal overload include:
• Fibrous materials: Corn husks, celery, onion skins, and artichoke leaves that wrap around the grinding impellers.
• Expandable foods: Pasta, rice, and potato peels that swell with water and create a dense, glue-like paste inside the grinding chamber.
• Foreign objects: Bones, fruit pits, bottle caps, or small utensils that slip past the rubber baffle.
The Impact of Continuous Heavy Use
It is also crucial to note that physical jams are not the only cause of a tripped thermal switch. In our years of providing plumbing solutions throughout Cerritos and the surrounding communities, our team at Power Pro Plumbing, Heating & Air has noticed that disposals rarely get a break during Southern California's year-round hosting lifestyle. Continuous, heavy use without adequate pauses can cause the motor to naturally overheat, even if the grinding chamber is perfectly clear of obstructions. When you are processing large batches of food scraps during a dinner party or early fall holiday gathering, running the unit for extended periods without sufficient cold water flow will eventually cause a thermal overload. Understanding this limitation helps you adjust your usage habits to prevent the switch from tripping in the first place.
The Safe Order of Operations for Resetting a Tripped Disposal
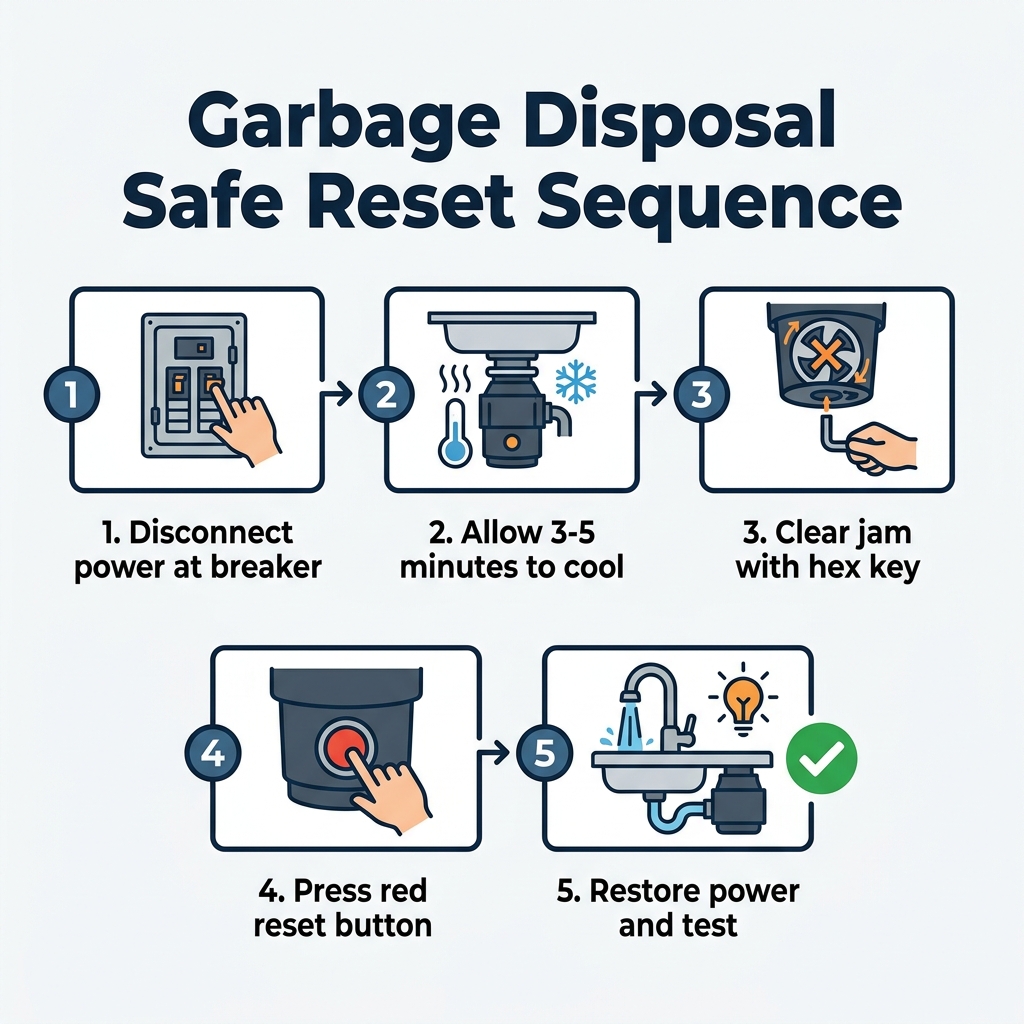
When the thermal switch has done its job and cut the power, restoring your appliance requires a specific, definitive sequence. Skipping steps or performing them out of order can result in immediate re-tripping, further damage to the motor, or severe safety hazards. Always prioritize electrical and mechanical safety by following these exact steps.

Step 1: Disconnect Power at the Main Panel
Never rely solely on the wall switch above the sink when performing mechanical troubleshooting. Wall switches can be accidentally bumped, or they may be wired incorrectly. Locate your home's main electrical breaker panel and flip the dedicated breaker for the kitchen disposal to the "off" position. This guarantees zero electrical current is flowing to the appliance while your hands are near the unit.
Step 2: Allow a Mandatory Cooldown Period
Patience is a required step in this process. The thermal switch cannot be reset while the motor housing is still hot. You must allow a mandatory cooldown period of at least 3 to 5 minutes. If you attempt to reset the unit immediately after it trips, the bimetallic strip will still be bent from the heat, and the button will simply refuse to stay pushed in.
Step 3: Clear the Physical Jam Manually
Before restoring power, the physical obstruction must be removed. Look at the very bottom center of the disposal canister for a small, hexagonal hole. Insert a standard 1/4-inch hex key (often called an Allen wrench) into this slot. This slot connects directly to the motor shaft. Firmly crank the wrench back and forth. You will likely feel significant resistance at first as the impellers grind against the jammed material. Continue working the wrench back and forth until the shaft spins freely in complete 360-degree rotations.
Step 4: Engage the Reset Button
Once the motor shaft spins freely and the unit has cooled down, locate the small, typically red reset button on the bottom or lower side of the canister. Press it firmly upward. You should feel a distinct "click" as the thermal switch re-engages. If it pops back out immediately, the unit needs more time to cool.
Step 5: Restore Power and Test with Cold Water
Return to your main electrical panel and flip the breaker back to the "on" position. Go back to the sink, turn on a strong flow of cold water, and flip the wall switch. The disposal should run smoothly. Keep the cold water running for an additional 15 to 30 seconds to flush the dislodged debris completely down the drain line.
Why the Hex Key Must Come Before the Reset Button
One of the most common mistakes our technicians see homeowners make is crawling under the sink and immediately pressing the red reset button without addressing the root cause of the trip. Distinguishing between a physical jam and an electrical trip is paramount. The overload protector tripped because the motor could not spin; if you do not fix the inability to spin, restoring power achieves nothing.
The Physics of a Locked Motor
If you press the reset button while a piece of bone or a mass of fibrous early fall vegetables is still wedged tightly against the impellers, the motor will attempt to start the moment you flip the wall switch. Because the shaft is physically locked in place, the motor will instantly draw a massive electrical load, hum loudly for a split second, and the thermal switch will immediately trip again. Repeating this cycle multiple times without clearing the jam forces the motor windings to endure repeated heat spikes, which can permanently degrade the insulation on the internal wiring and destroy a standard continuous feed disposal entirely.
Properly Utilizing the Manual Crank Slot
This is exactly why the hex key must always come before the reset button. The manual crank slot on the bottom of the canister bypasses the electrical system entirely, allowing you to use mechanical leverage to break the obstruction free. When you insert the hex key into the center hole and manually crank it, you are physically forcing the grinding plate to rotate backward, dislodging whatever is wedged between the impellers and the shredder ring.
Key indicators that the jam is cleared:
• Initial resistance gives way: The wrench will be difficult to turn at first, then suddenly release.
• Smooth rotation: You can turn the hex key in a full, uninterrupted circle with minimal effort.
• No grinding noises: As you manually turn the shaft, you should not hear metal scraping against metal.
The impellers must spin freely before electrical power is ever reintroduced. If you find yourself struggling to turn the hex key, or if you are unsure whether the resistance you feel is normal, it is best to pause. For a deeper understanding of when to keep trying and when to stop, reviewing a comprehensive diagnostic guide on When to Use a Hex Key vs Replacing a Dead Garbage Disposal Motor can help clarify the boundary between a stubborn jam and a failing appliance.
What It Means When the Red Reset Button Won't Stay Pushed In
Even if you follow the order of operations perfectly, you may encounter a scenario where the red button simply refuses to stay pushed in. This common failure state defines the boundary between safe DIY troubleshooting and the need for professional intervention. Understanding what a persistent trip signifies can save you from wasting time or creating a dangerous electrical situation.
Diagnosing a Permanently Tripped Thermal Switch
The most frequent reason a reset button pops back out immediately is impatience. Reiterating the importance of the mandatory cooldown period is essential; if the motor housing is still warm to the touch, the internal bimetallic strip has not contracted enough to hold the switch closed. However, if you have waited a full 15 to 20 minutes, the unit is completely cool, and the button still will not click into place, you are likely dealing with a more severe internal failure.
• Button pops out immediately (unit is warm) — Likely Cause: Thermal switch is still hot from the initial overload. — Recommended Action: Wait 15 minutes and try pressing the button again.
• Button stays in, but unit only hums and trips again — Likely Cause: The physical jam was not fully cleared by the hex key. — Recommended Action: Disconnect power and repeat the manual unjamming process.
• Button refuses to click in after 30 minutes of cooling — Likely Cause: The internal switch mechanism has physically broken. — Recommended Action: Professional diagnostics required; replacement likely.
• Distinct burning electrical smell near the canister — Likely Cause: The motor windings have burned out completely. — Recommended Action: Leave power off. Professional replacement required.
When DIY Troubleshooting Ends
If you experience a burning electrical smell, or if the unit makes absolutely zero humming noise when the button is engaged and the switch is flipped, the motor has likely suffered catastrophic failure. This is the point where safe DIY troubleshooting ends. A standard continuous feed disposal operates on high voltage, and attempting to open the sealed motor housing or bypass the thermal switch is incredibly dangerous.
When a reset fails, bringing in expert technicians for rapid diagnostics bridges the gap between a simple DIY fix and professional intervention. Having responded to countless jammed disposal calls across Cerritos, our experienced team at Power Pro Plumbing can safely determine if the unit can be repaired or if a replacement is necessary. Furthermore, persistent disposal issues might actually tie into larger household plumbing problems. If the unit struggles because it is constantly churning through standing water that will not clear, your core issue may require comprehensive drain and sewer services to remove a deep blockage in the main line.
Frequently Asked Questions About Garbage Disposal Overloads
Understanding the nuances of your kitchen plumbing can prevent minor annoyances from escalating into major disruptions. Here are direct answers to the most common questions homeowners have when dealing with a tripped overload protector.
Where exactly is the reset button located?
The reset button is usually located on the very bottom or the lower side of the disposal canister under the sink. It is a small, typically red, square or round button that pops outward when the internal thermal switch has tripped. You may need a flashlight to clearly see it, as it is often recessed slightly into the casing to prevent accidental bumps.
Why does my garbage disposal keep tripping the reset button?
A unit that repeatedly trips indicates a persistent physical jam, an overworked motor, or a failing electrical component. This often happens during heavy seasonal cooking prep if fibrous vegetables—like celery, onion skins, or early fall squash—are processed too quickly without enough cold water flow. If the button trips immediately after being reset, the impellers are likely still locked by debris and must be manually cleared.
How long should I wait before trying to reset the disposal?
A minimum of 3 to 5 minutes is required for the internal thermal switch to cool down sufficiently to hold the reset. If the motor was running for a long time before it jammed, it may take up to 15 minutes for the internal bimetallic strip to contract back to its normal resting position. Pressing the button too early will simply cause it to pop back out.
Can a slow drain cause the overload protector to trip?
Yes, if water backs up and forces the impellers to churn through standing water and heavy debris, the motor works much harder and can easily overheat. The added resistance of deep water prevents the shredder ring from efficiently processing food scraps. If you notice water pooling in the sink before the unit trips, you must fix your slow drain to prevent the motor from constantly overloading in the future.
Get Professional Diagnostics When a Simple Reset Isn't Enough
A quick, safe mechanical reset satisfies most early fall cooking jams, allowing you to return to your kitchen prep with minimal interruption. By understanding the relationship between the thermal switch, the hex key slot, and the red reset button, you can confidently address the vast majority of standard continuous feed disposal interruptions. However, if you have followed the strict order of operations and the unit remains unresponsive, it is time to step back.
A permanently dead motor, a button that refuses to lock into place, or complex electrical issues require licensed help. Do not risk electrical shock or further plumbing damage by attempting to disassemble the motor housing yourself. If your kitchen cleanup remains at a standstill, scheduling a professional inspection with our team is the most effective way to accurately diagnose whether a minor repair or a full unit replacement is the safest route forward.